Photo restoration
Restore an old photo with AI — without inventing a new face
The print came out of a drawer: yellow at the edges, a crease across the top right, the faces soft where the paper has been handled. A repair that rebuilds the eyes from nothing hands you a clean picture of somebody else. This one starts from your scan, and it is told what to leave alone.
Two free tries, no account. Credits start when you pick a plan.
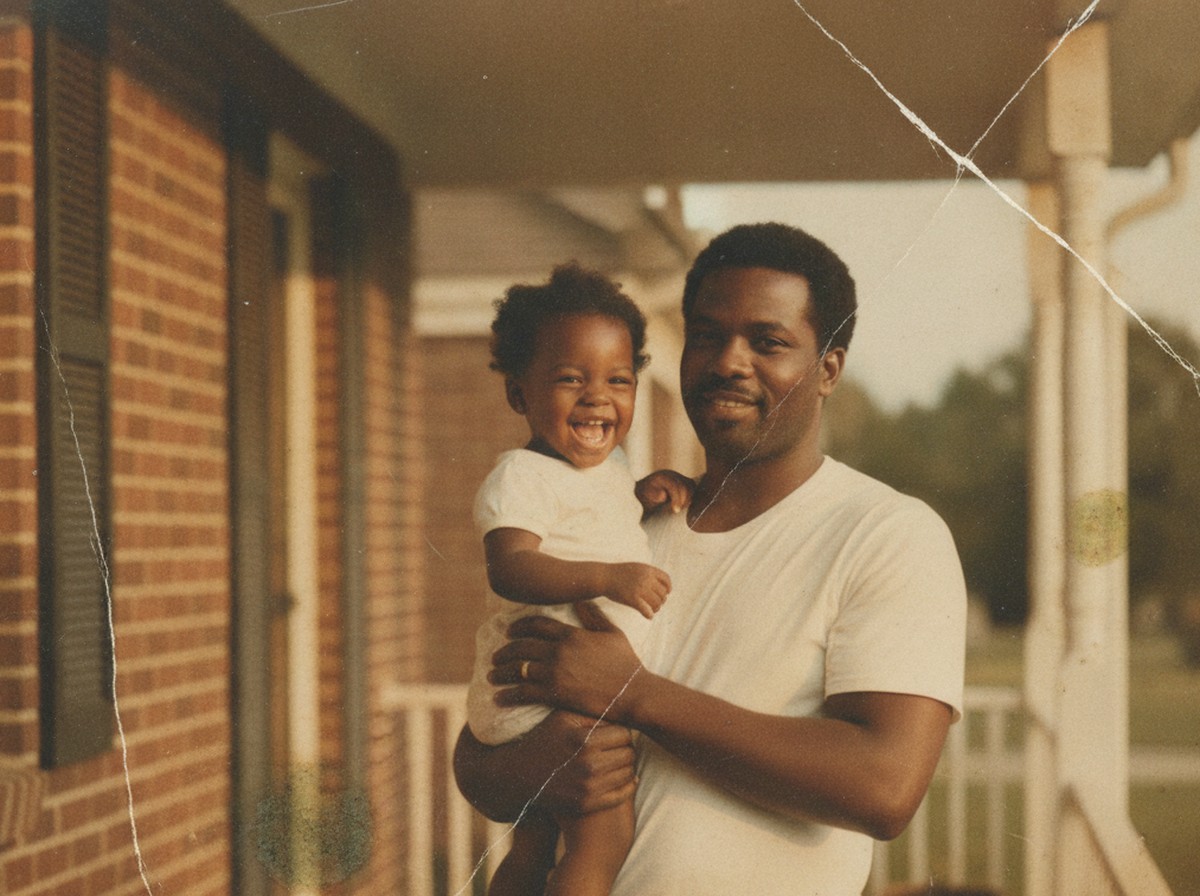 Before
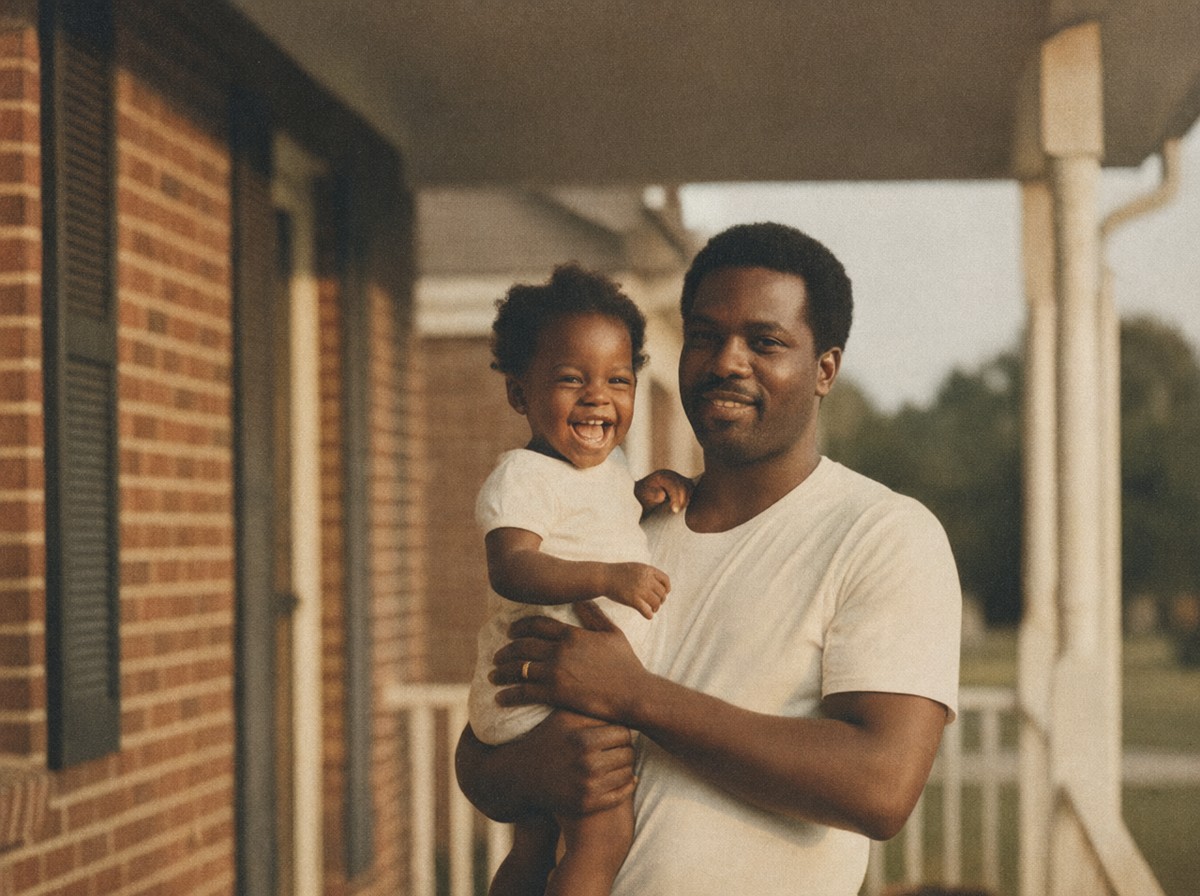 After
What this tool can fix (and what it will not invent)
Most bad restorations come from asking one model to do two different jobs: repair the paper, and guess a person. We only promise the first. The split below is the whole policy, so you can decide in ten seconds whether your print belongs here.
Colour cast, dust, light scratches, soft scans
The scan is yellow, dull, speckled with dust, a little out of focus. Those are paper problems, and image to image is good at them: the model reads the print, takes out what should not be there and rebuilds the tone underneath.
- The orange-yellow shift that comes with age
- Dust, flecks, hairline scratches
- A scan that lost its contrast in a cheap flatbed
- A phone photo of a print, shot a few degrees off square
Grain, warm light, the face
A restored photo should still look like a photograph. Ask for the grain and the warm cast to stay, and the result reads as a print from that decade instead of a clean render. The face stays because you name it in the sentence, and because the starting point is a picture of that face.
- Film grain and paper texture
- The warm light of the room it was taken in
- The clothes, the hair, the age of both
- The face, first of all
Missing eyes, torn-away faces, corners that never existed
If a third of the face is gone, no model can restore it. It can only invent — and invention is exactly what makes restored family photos feel wrong: too smooth, too symmetric, three years younger than the last photo of that person. For damage that size, a retoucher painting by hand is the honest answer.
How to restore a photo in three steps
The whole loop is upload, one sentence, compare. Nothing here needs a layers panel.
Upload the scan
A flatbed at 300 to 600 dpi beats a phone photo of the print every time. Straighten it before upload, crop out the scanner lid, and send the JPG, PNG or WEBP straight from the folder. Files up to 20 MB go through.
Pick a model, write one line
Creative 2.0 when the picture is mostly faces. Seedream 4.5 when the paper texture and the print itself matter. In the prompt, say what changes first and what has to stay second — that order is what keeps the result on the right side of the line.
Compare at full zoom, then export
Open the result against the original at 100%, not in a thumbnail. If a face moved, run it again with a different model rather than rewriting the prompt five times. Then export PNG or JPG at 1K on Free, 2K or 4K on a plan.
Which model to pick for family photos
Four models cover almost every print in a drawer. The other eighteen in the studio are for jobs that are not this one.
| Model | Use it when | What it does | Plan |
|---|---|---|---|
| Creative 2.0 | The picture is faces, close up | Holds the bone structure of a face while it repairs around it, about 11 seconds | Free |
| Seedream 4.5 | Paper texture, print grain, a 4K file | Sharper on fine texture; the 4K pass takes closer to half a minute | Pro |
| Nano Banana 2 | The likeness has to be exact | The most faithful skin and face in the list, and it goes up to 4K | Pro |
| Basic 1.0 | A first look before you spend anything | Faster and blunter. Fine for testing the wording of the prompt | Free |
Free runs come out at 1K with a small watermark. A plan removes it and opens the bigger sizes. The image to image page has the full list of twenty-two if you want to compare them all.
Before and after — same print, clearer file
People judge a restoration from a thumbnail and end up with plastic skin. The two crops below are the pair just above, zoomed into the top right corner where the crease used to be.
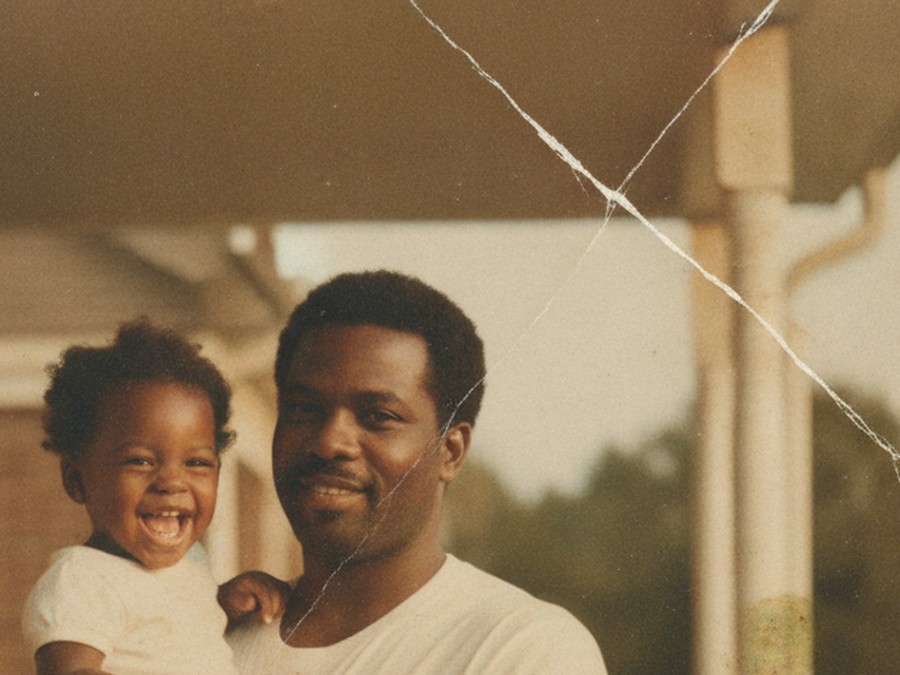 Before, 100%
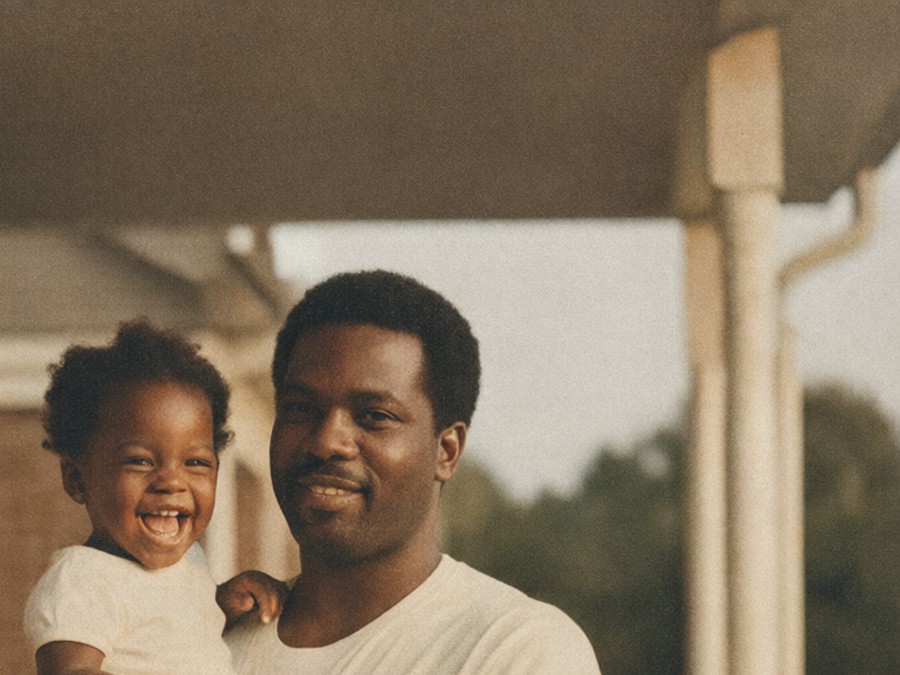 After, 100%
What changed: the cast, the dust, the mould spots, the creases. What stayed: the grain in the shadows, the light coming in from the porch, both faces. If a restoration gets the second list wrong, the first list does not matter.
Four more prints, each damaged a different way
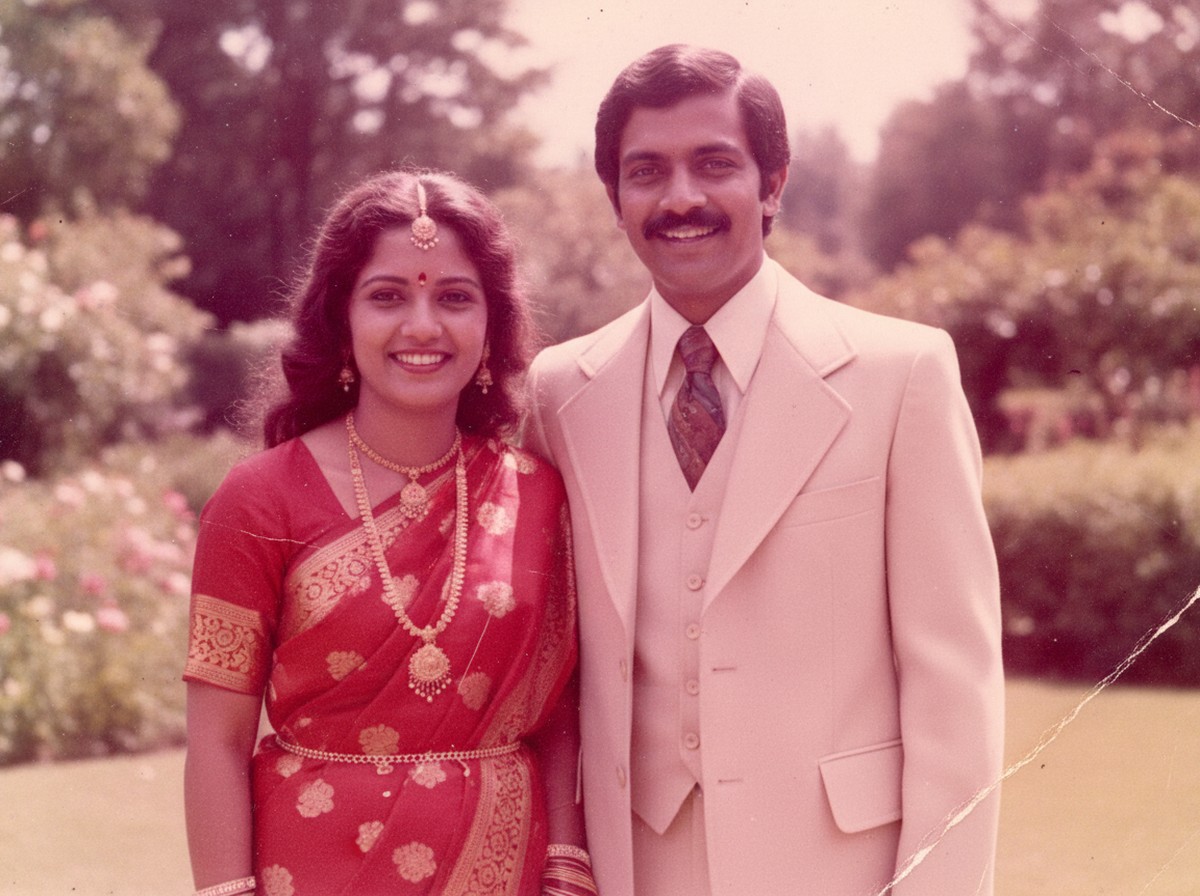
Same loop every time: upload the scan, type one sentence, compare at 100%. The sentence printed under each pair is the brief that was typed, and the only thing that was typed.
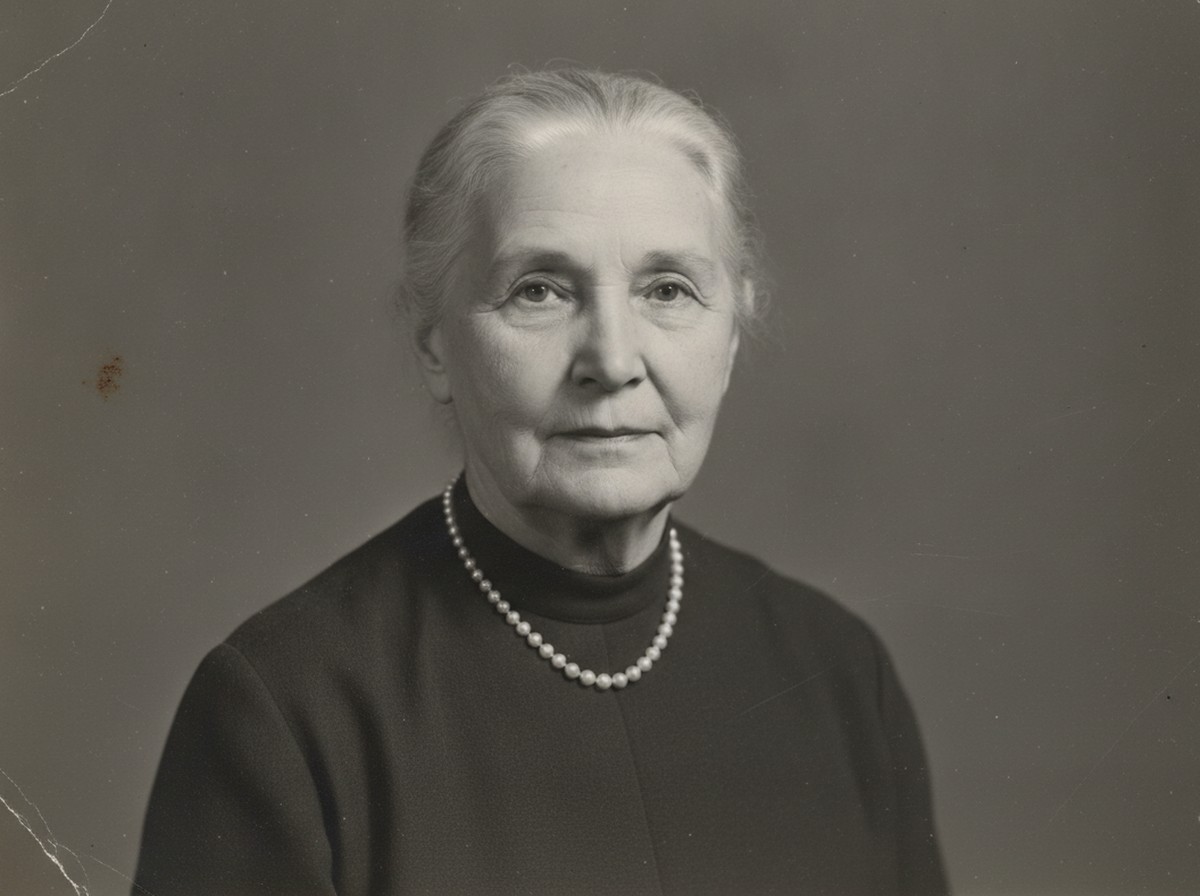 Before
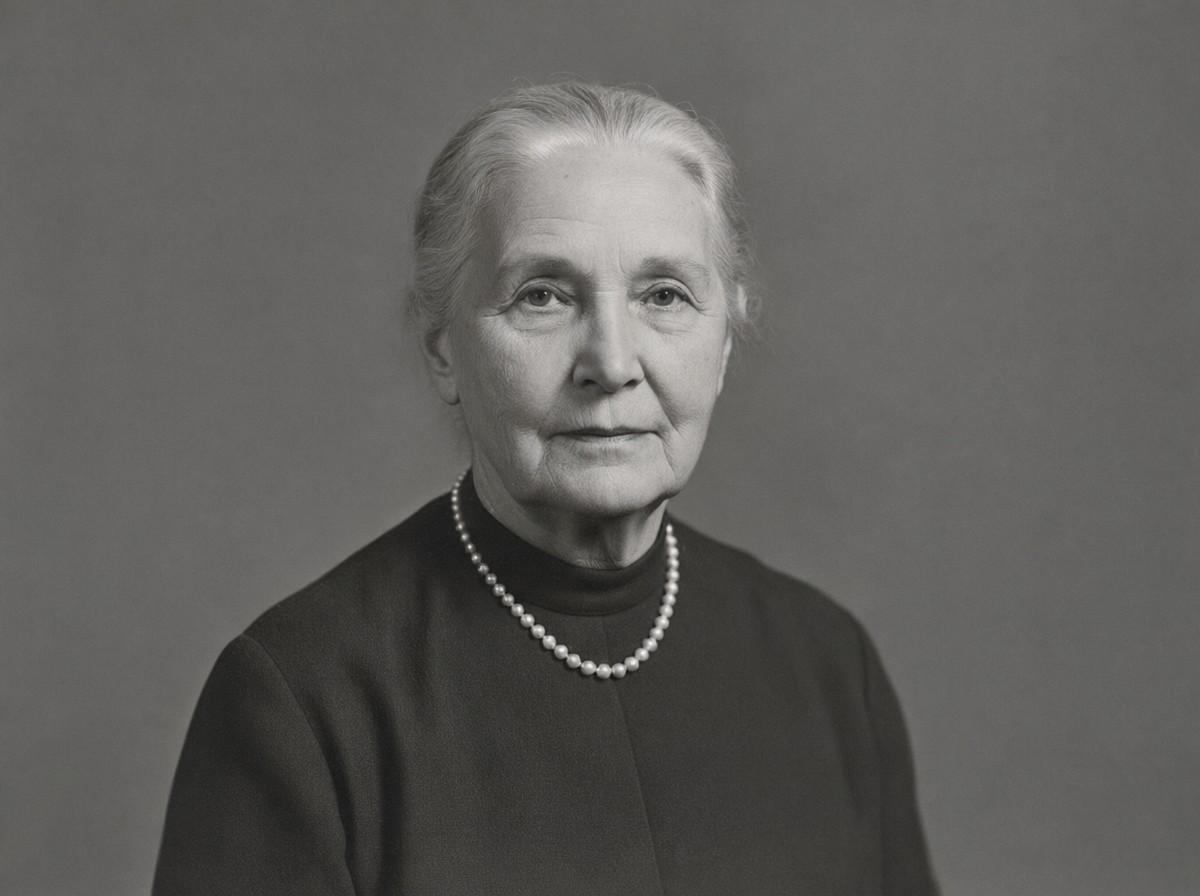 After
A studio portrait that had foxed in the corners
Brown spots had come through the paper at the edges and both corners had creased. They are gone. The face, the pearls and the grey backdrop are the ones that were there before, which is why the sentence names them.
 Before
 After
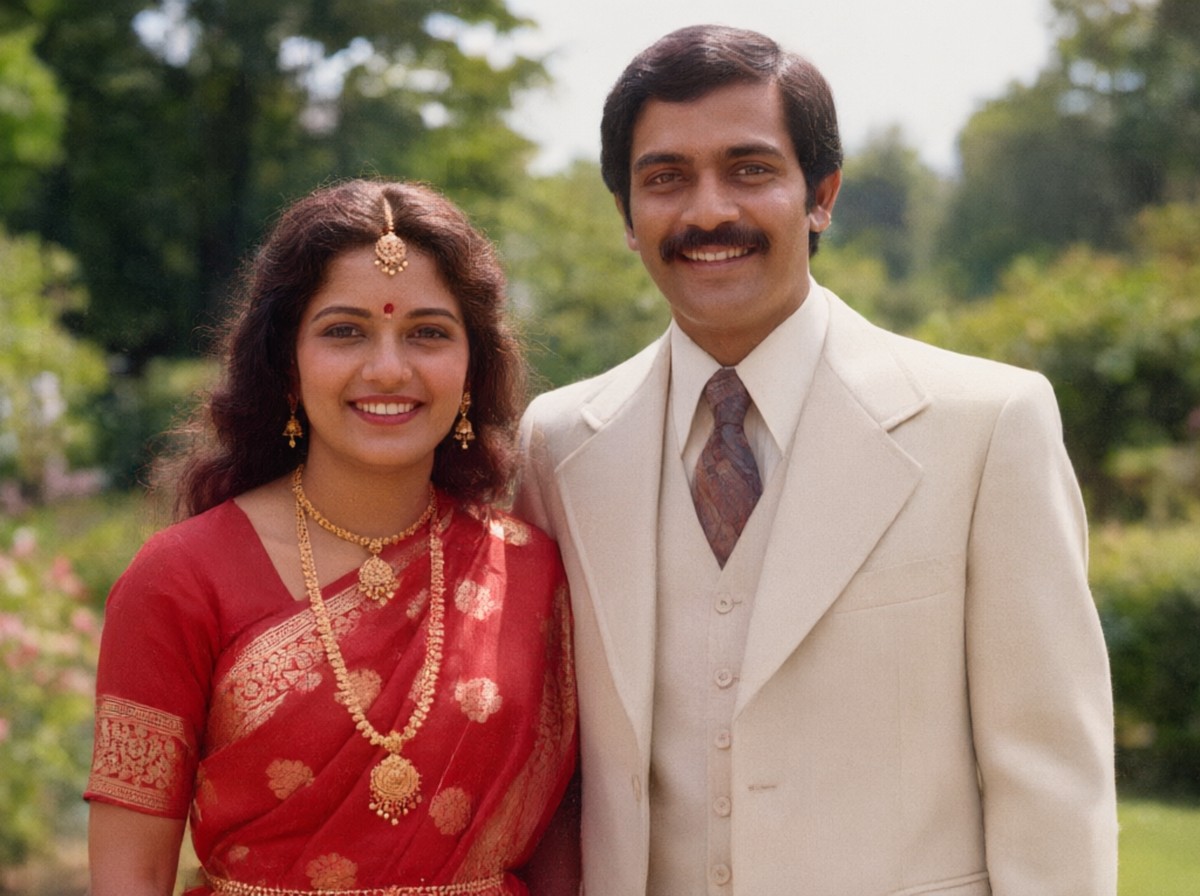
A wedding print that had turned pink
Years in a warm room pushed the reds towards magenta and washed the highlights out. The colour came back close to the original, the scratches across the lower right went with it, and the grain stayed.
 Before
 After
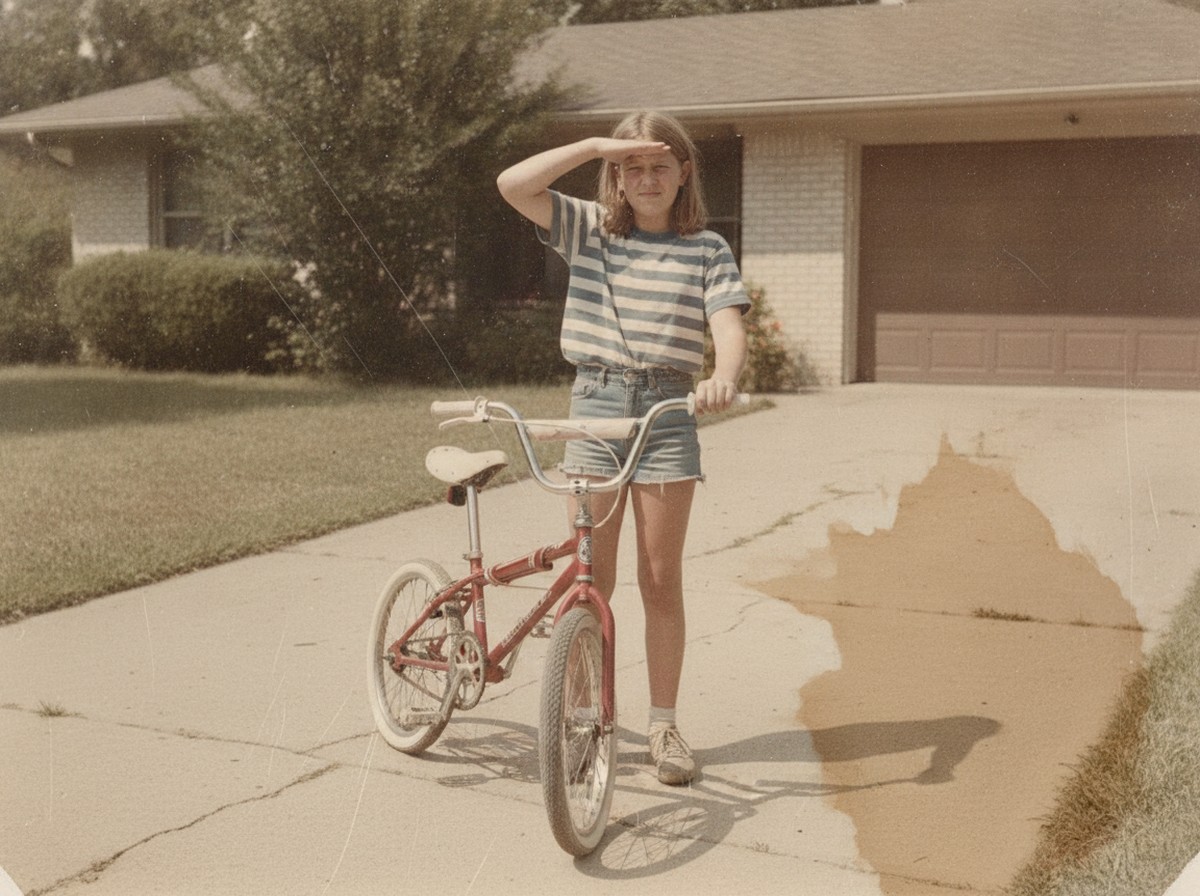
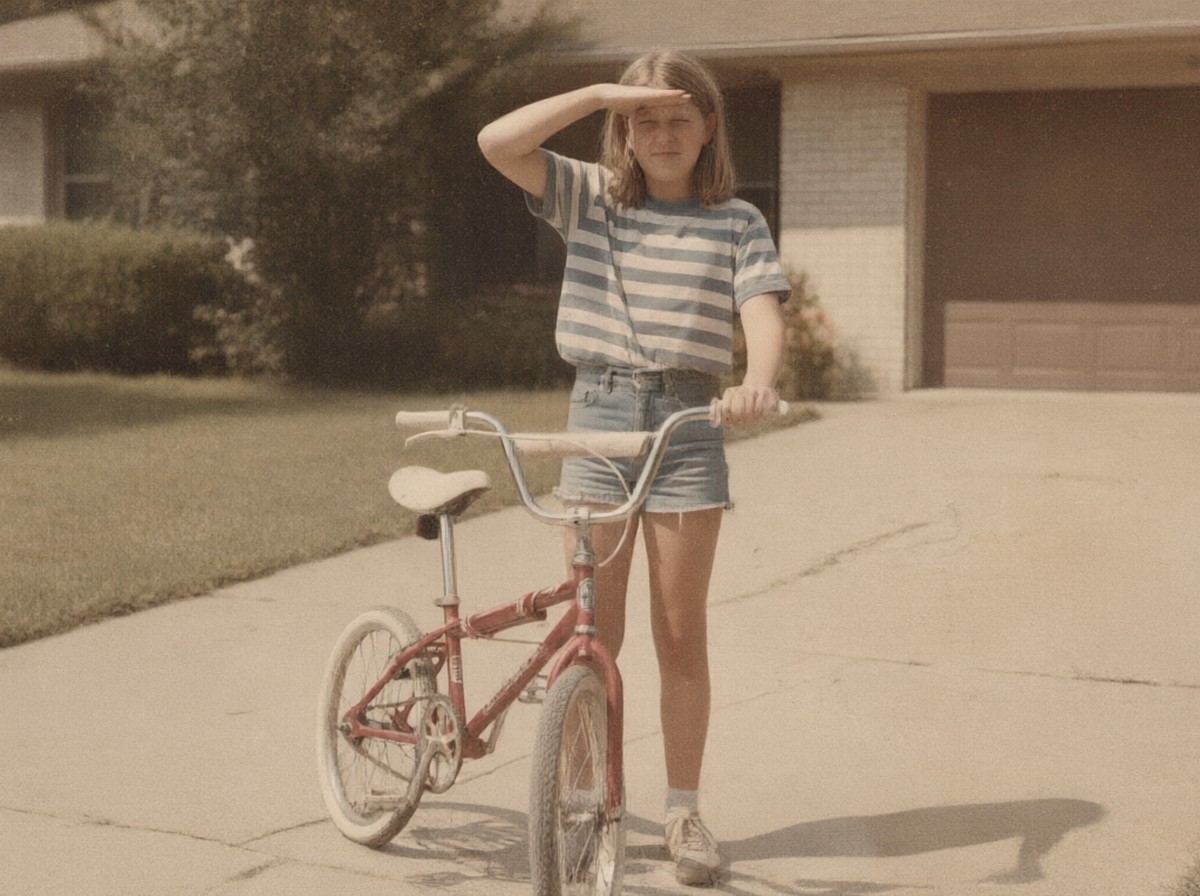
A driveway snapshot with a stain over it
Sun fade, dust and a brown stain spreading up from the corner. The stain is gone and the concrete reads as concrete again. The squint and the shine on the bike were never the problem.
 Before
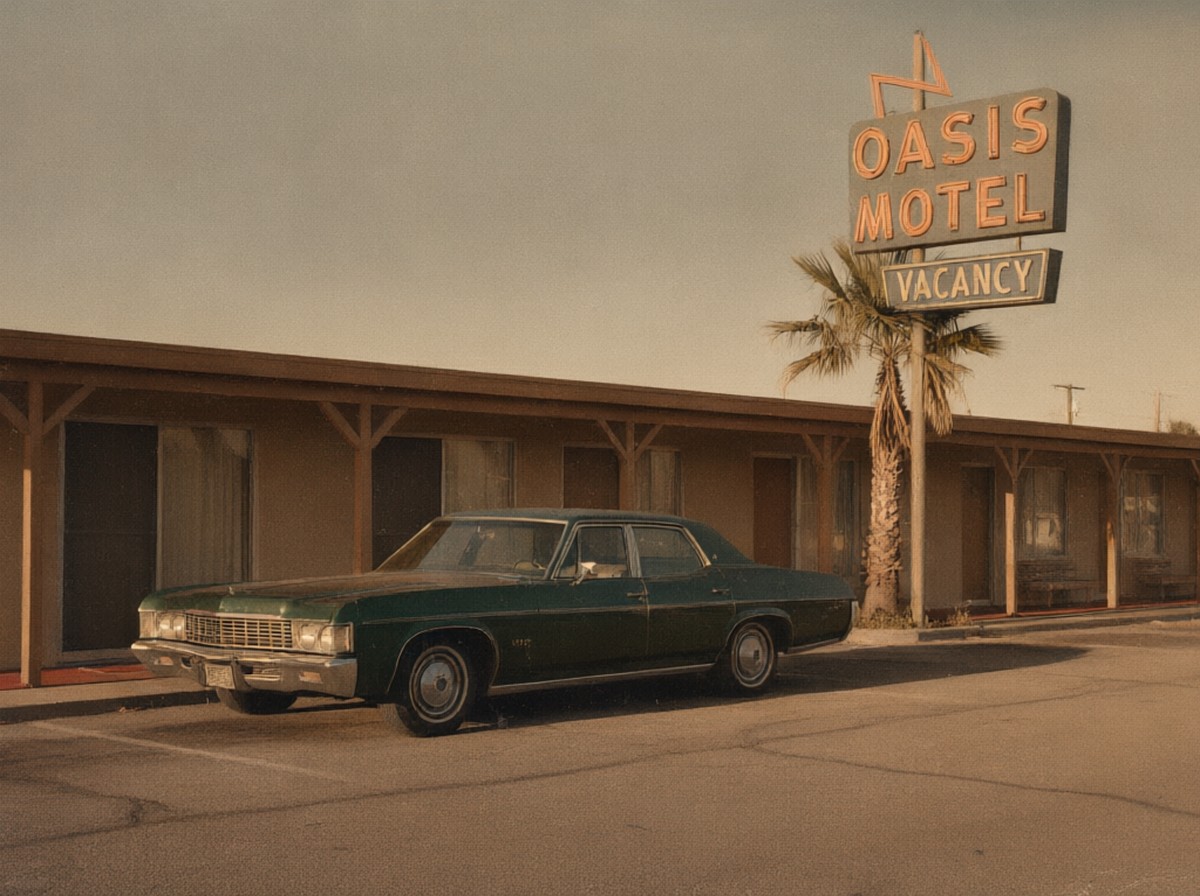 After
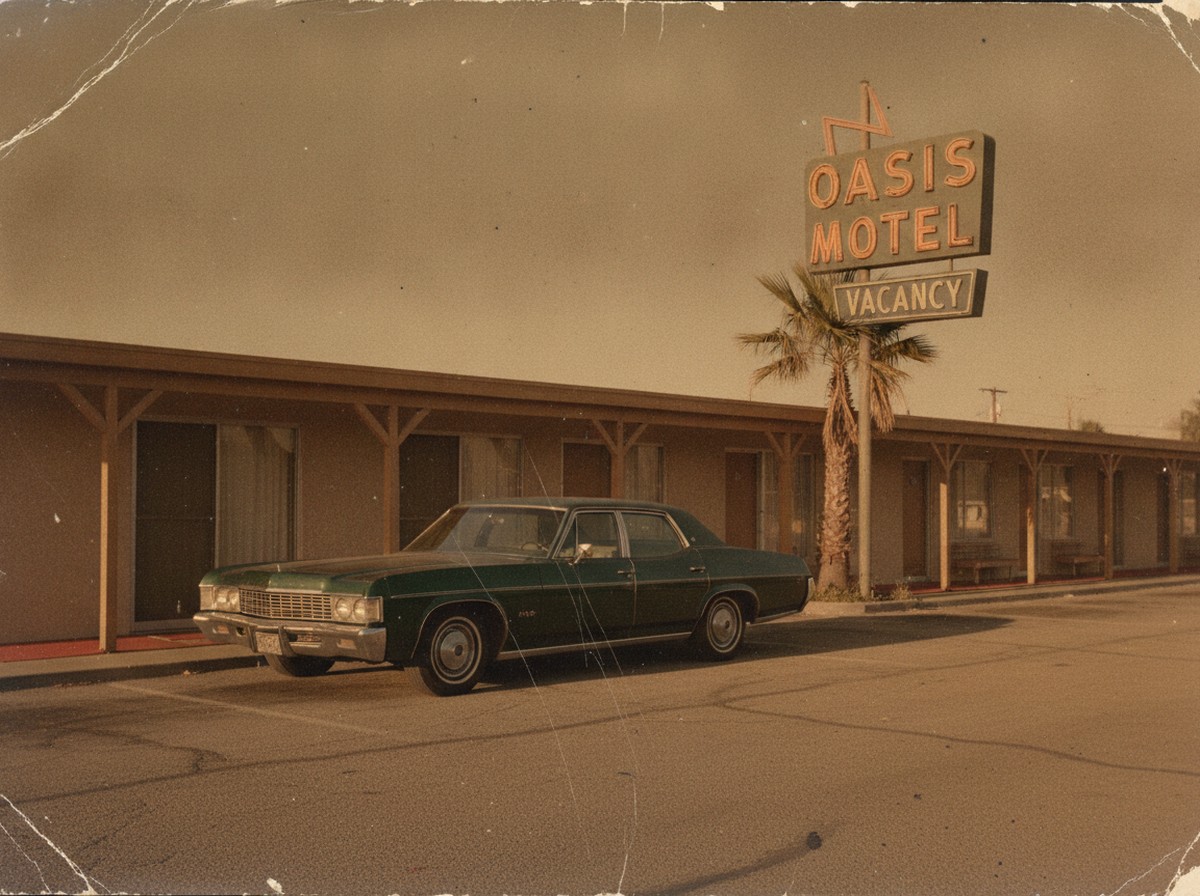
A car photo that had gone yellow in an envelope
Colour film, decades in a drawer, and a cast that turned every pale panel olive. The cast and the scratches lifted; the car, the sign and the light did not move. Nothing was redrawn.
Optional: colorize a black-and-white scan
Colour is a second job, not a default. Send a black-and-white print and say nothing, and it comes back black and white.
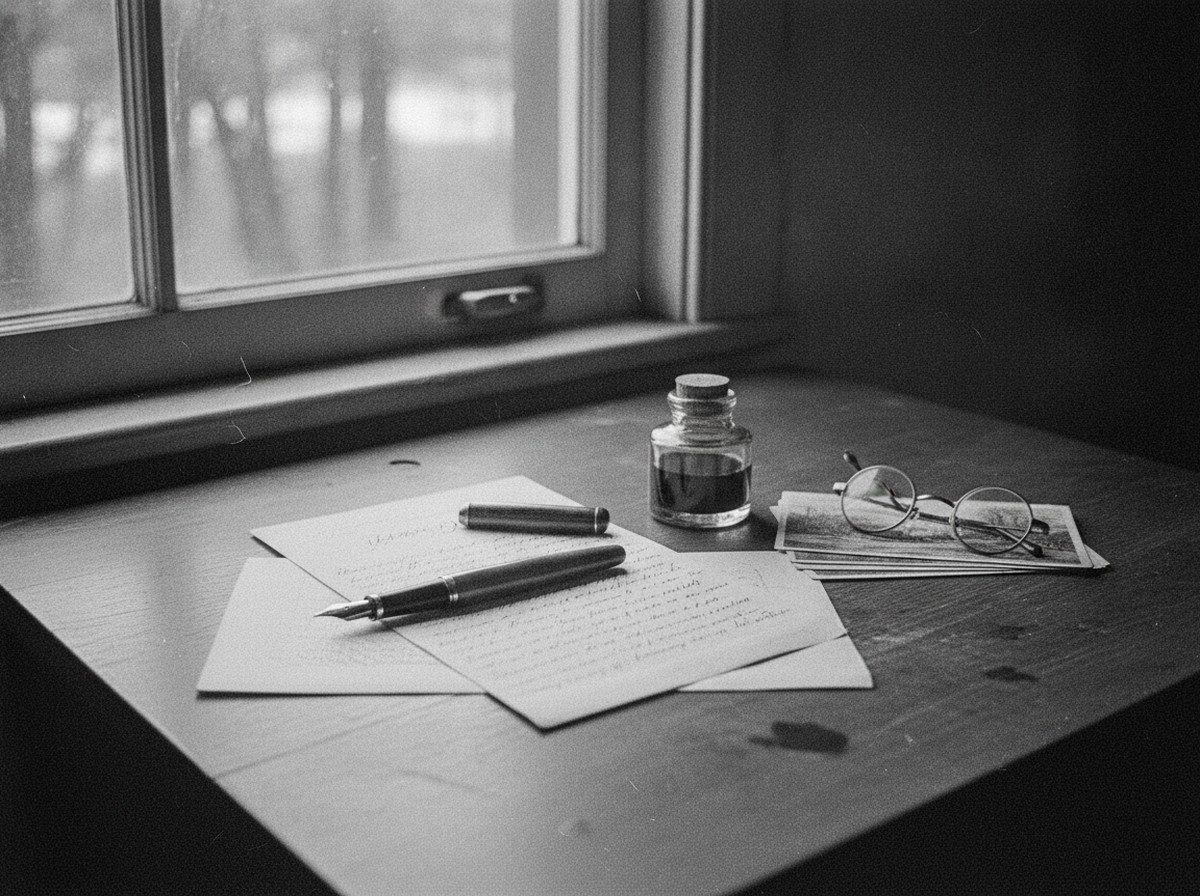 Black and white
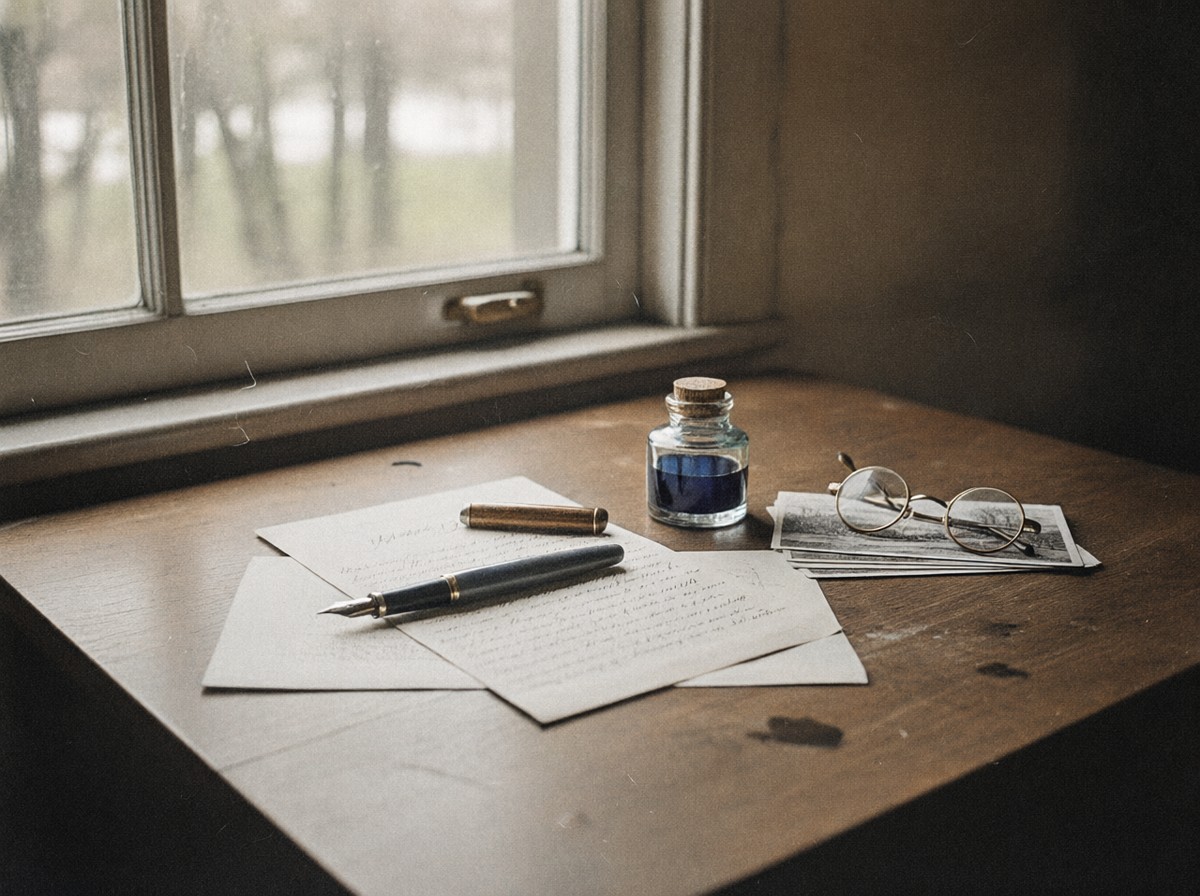 Colour added
Ask for it and the model has to choose a plausible skin, a plausible cloth, a plausible wood — that is a different kind of risk from repairing what is already in the frame. Two habits keep it usable.
First, keep the black-and-white file. Run the repair in black and white, export it, then colour a copy, so the version you cannot get back is not the only one you have. Second, for portraits, expect the skin tone to be the part that needs a second pass. A slightly wrong shade of grey in a coat goes unnoticed; a slightly wrong skin tone does not.
A torn face is a job for a retoucher
We would rather write this here than take your money twice. If the damage is a hole where an eye should be, a missing corner of a face, or a whole person cut out of the frame, restoration becomes invention. The model fills the gap with an average face pulled from everything it has seen, and average is the wrong answer for somebody's father.
A restorer working by hand decides what that face looked like, from other photographs and from what you remember. That is a different trade. Use Scenedo for the paper — the cast, the dust, the scratches, the soft scan — and keep the missing parts for a person.
Questions about restoring family photos
What can AI photo restoration actually fix?
Colour cast, dust, light scratches, and a scan that came out soft or washed out. It works from your file — image to image, not a new portrait — so everything it repairs is built on the pixels you sent.
Will it keep the person's face?
Name the face in the prompt, pick Creative 2.0 or Nano Banana 2, and it usually holds. A heavy rebuild — new light, new decade, half the frame redrawn — can still drift. Compare at 100% before you send the file to anyone.
Can it colorize a black-and-white photo?
Yes, if you ask for it. Left alone, a black-and-white scan comes back black and white. Colour is invented on top of the repair, so keep the uncoloured file as well as the coloured one.
What if a face is torn or missing?
Then it is a retouching job rather than a restoration. A model can fill the gap, but it fills it with an average face, and that is the uncanny part of most "restored" family photos. Use the studio for the paper and a retoucher for the person.
Who owns the restored file? Family photos and copyright.
You keep what you make, under our terms. The part worth checking is the original: a scan of a print you own is usually fine, while a scan of a studio portrait may still belong to the photographer. We do not claim the memory and we do not resell it.
Are my family photos used for training?
No. Uploads are not used to train models and are not passed to third parties for training. Results are kept per plan — 7 days on Free, 12 months on Pro — and you can delete any image from its page.
Do I need an account?
Not for the first two images. Two free tries, no account, no card, and the allowance is one-off rather than daily.
Where to go next
Two free tries, then pick a plan.
Scan one print tonight. No account and no card for the first two images.