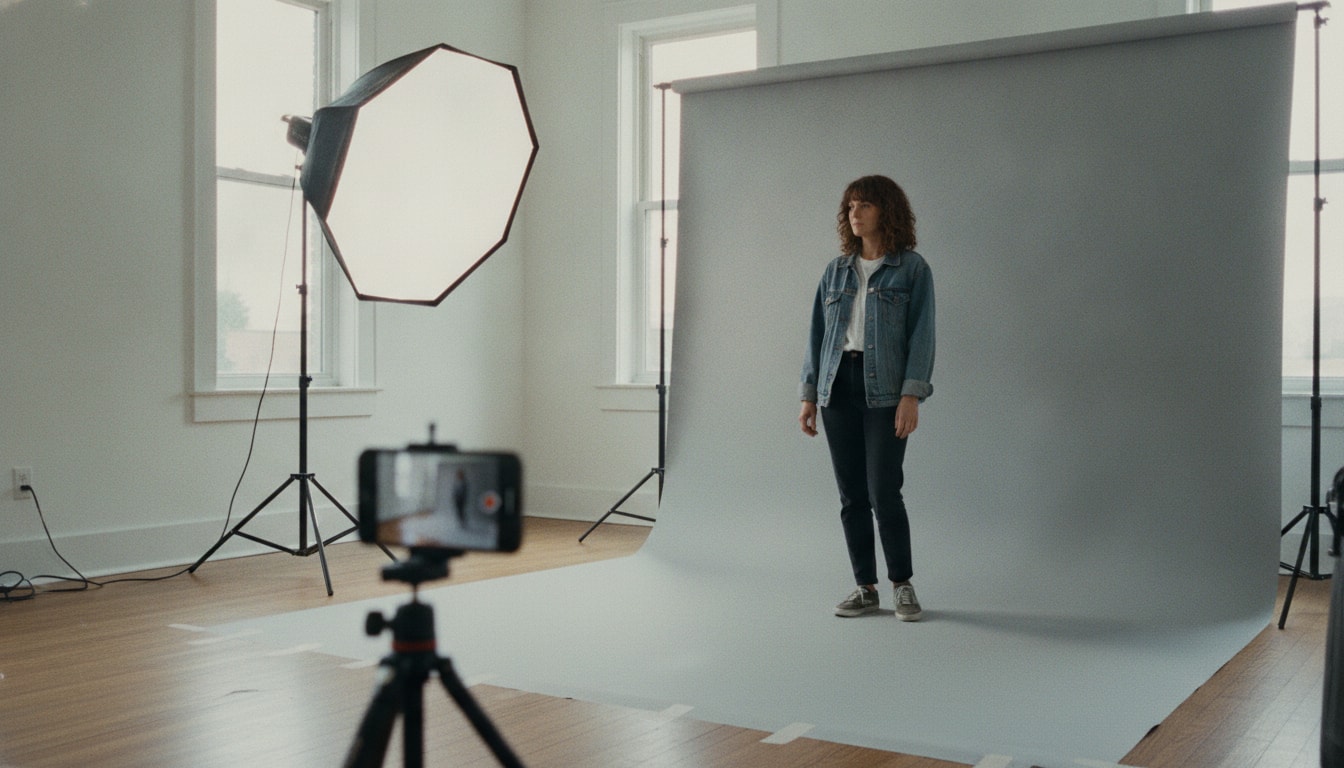
Background change
Change the background. Keep the subject.
A busy street, a greasy counter, an office with two colleagues walking past. Say what has to stay and what should replace it, and the whole scene behind your subject gets rebuilt: new room, new light, same person, same product.
Two free tries, no account. One photo in, one finished frame out.

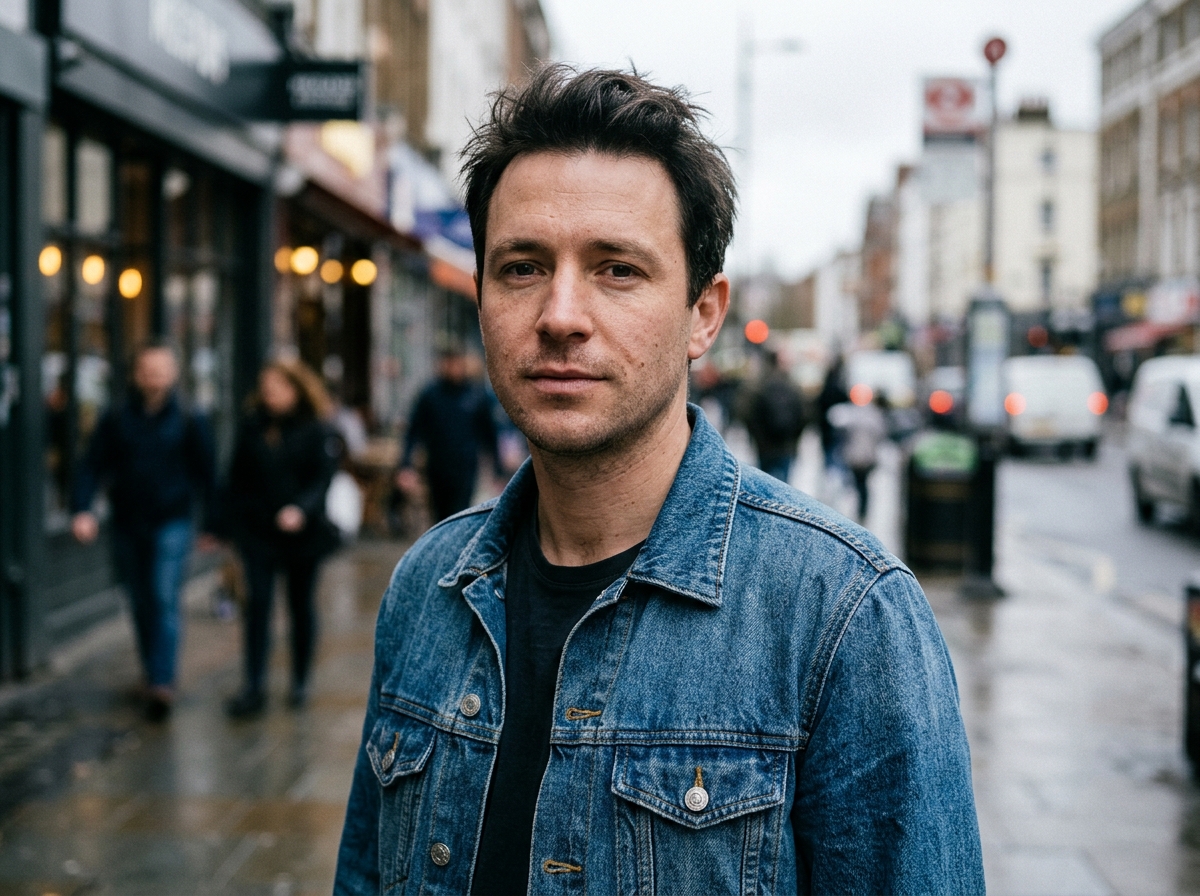
The shadow is the thing to check first
A cutout tool removes the street in one click and charges nothing. What it cannot do is stand your subject back on the ground. In the frame above, the original was shot under a flat grey sky with the glow of shop windows behind his left shoulder; the flat sweep keeps the light coming from the front and puts one soft shadow behind the shoulder.
No shadow reads as pasted. Two shadows read as a mistake. One soft shadow, in the direction the light already came from, reads as a studio.
Look for that shadow before you look at the background itself. A perfect wall with a floating person is a worse result than a slightly plain wall with a believable shadow, and it is the first thing a buyer or an editor notices at 100%.
Three reasons a background gets rebuilt instead of reshot
Nobody books a second shoot because the subject was wrong. They book it because of what sat behind the subject, and because the light in that room was never going to be right.
The room behind them
The photo was taken at home and the listing wants a studio; it was taken in the office and the profile wants a plain wall. The subject is fine, the scene is not, and no amount of cropping removes a door frame or a laundry basket.
The light in that room
One bulb overhead, flat grey at the window, a phone flash hitting gloss paint. Replacing the background is also the moment to say where the new light comes from and what it leaves behind the subject.
Everything else in frame
Nine tourists, a dish rack, a wheelie bin, the neighbour’s van. Most phone photos fail at the edges of the frame. Cropping tighter is the cheapest first move, before you spend a credit.
Eight backgrounds, and only one thing changes in each
Every right-hand frame was made from the left one with one typed instruction and nothing retouched by hand. The first four take things out and leave the room, the light and the camera exactly as they were. The last four swap the whole backdrop while the subject, the pose and the viewpoint stay put.
 Before
 After
The colleague and the desk mess, gone
Two people walking past behind her, a nest of cables and a stack of paper in front. Nothing about the room changes: same pale wall, same ceiling tubes, same cool light, same chair. She keeps the lean, the hands on the laptop and the exact spot in the frame; only the people and the clutter come out.
 Before
 After
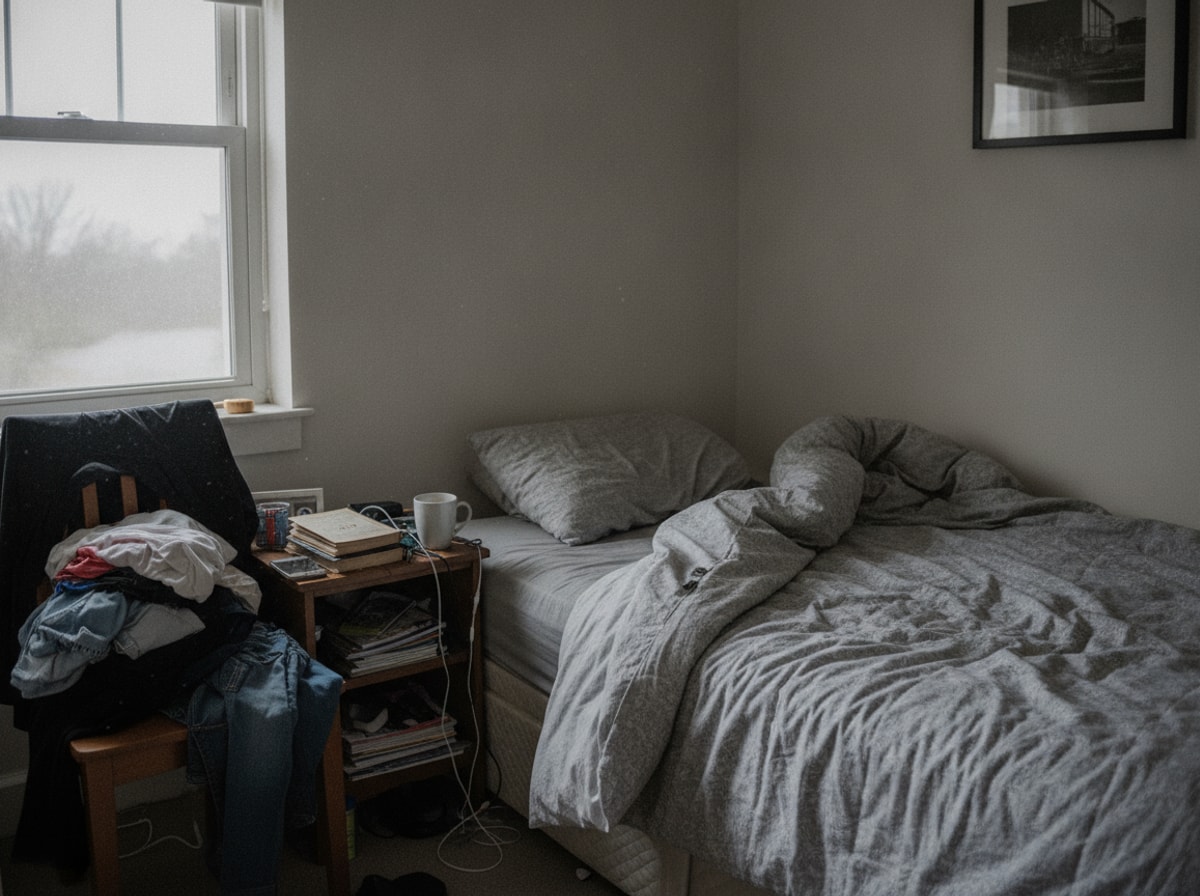
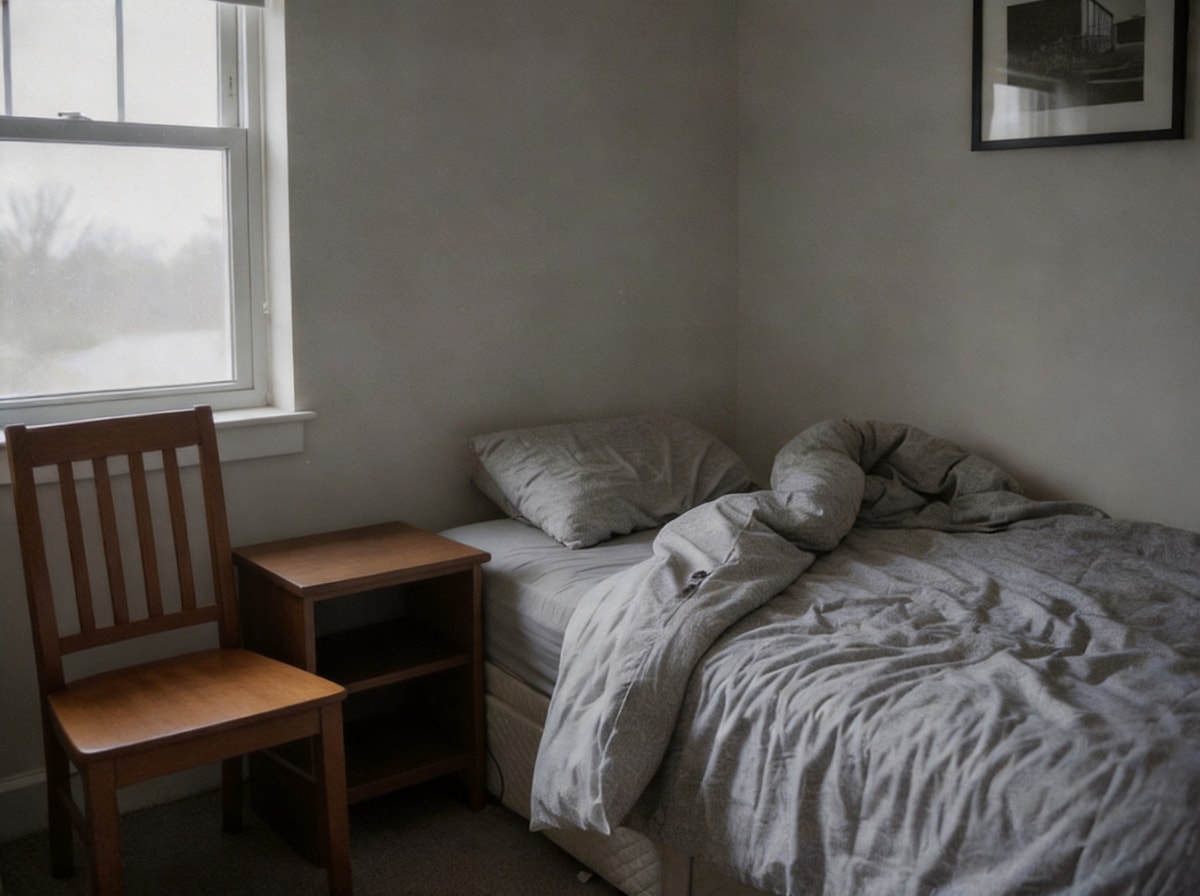
The same bedroom, five minutes tidier
The camera does not move and the flat grey afternoon stays exactly as it was. The heap of clothes and bags leaves the chair, the bedside table is cleared, the mug and the cable are gone from the floor. The bed is still unmade, because this pass takes objects out; it does not restyle the room.
 Before
 After
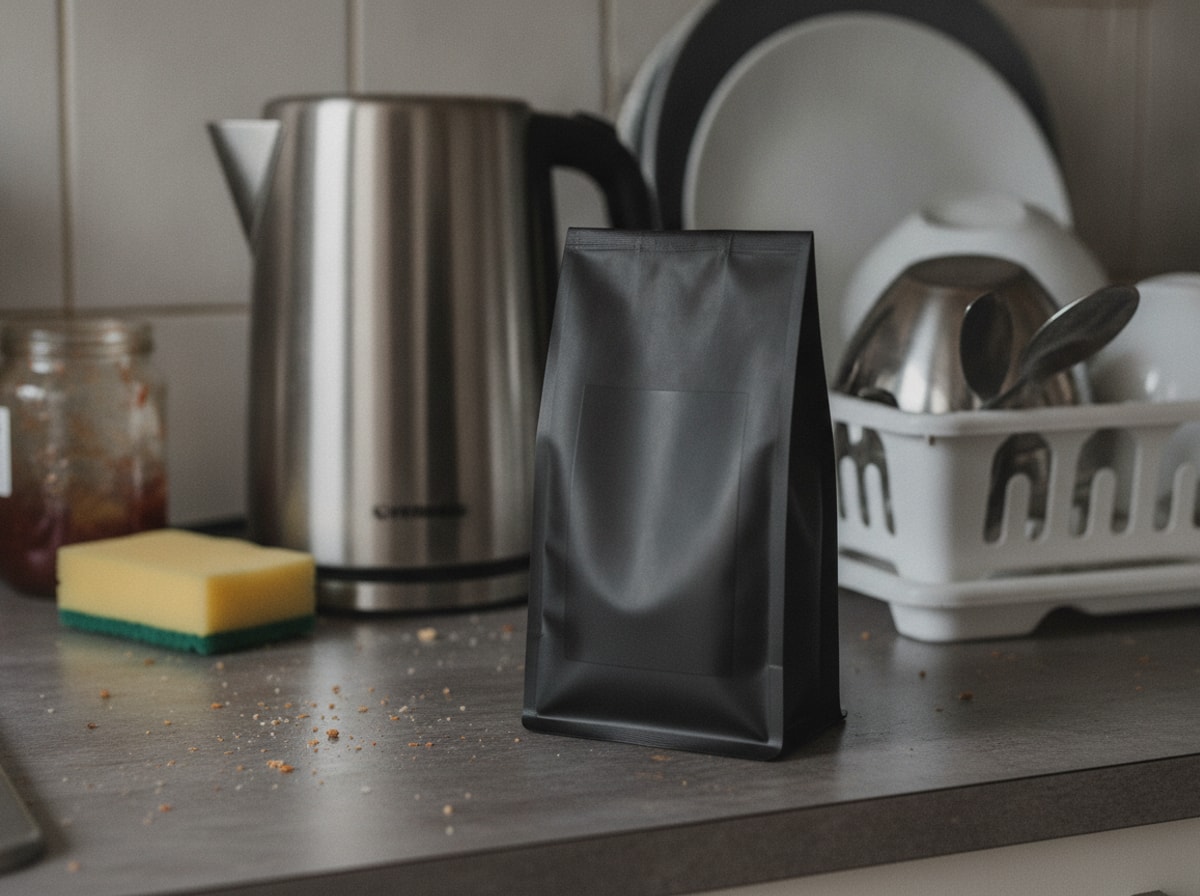
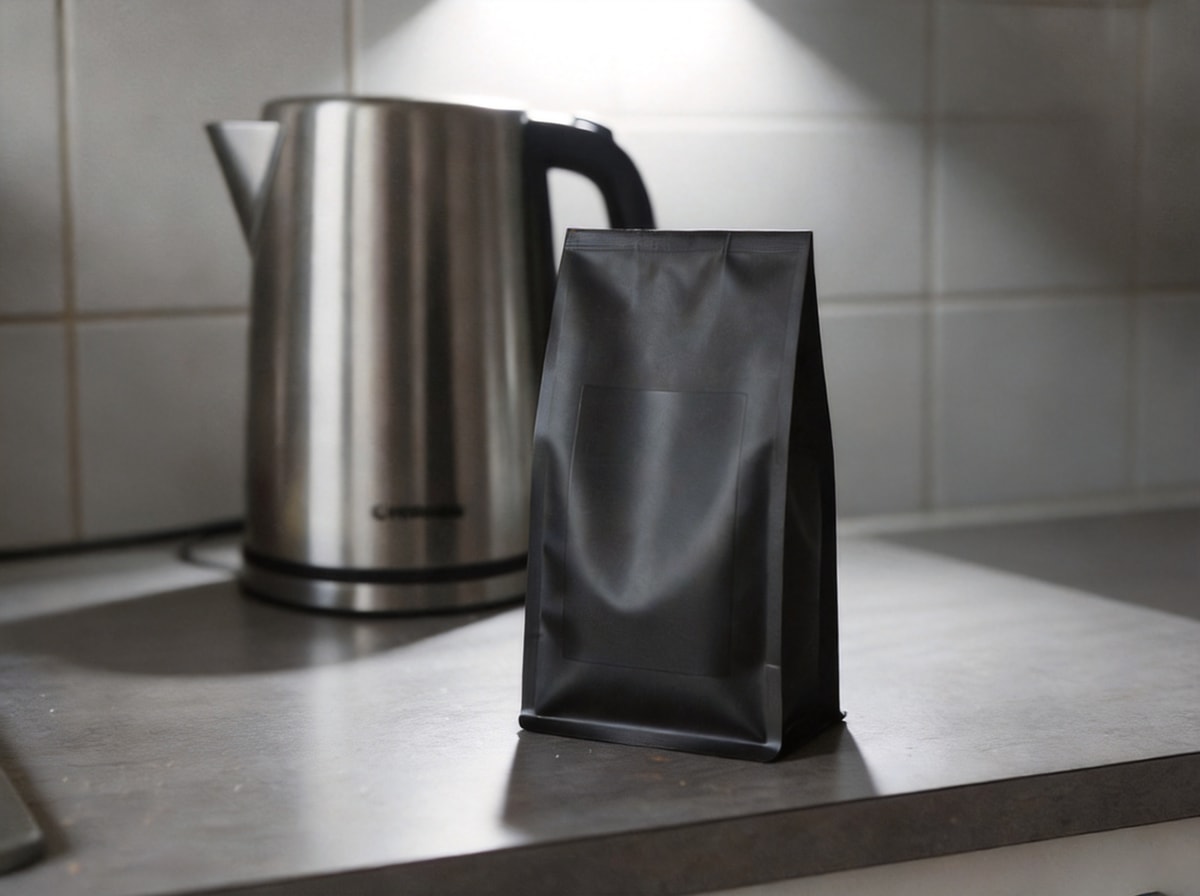
One counter, cleared
Same tiles, same hard bulb overhead, same bag and kettle in the same spot with the same shadow. The crumbs, the sponge, the jar and the dish rack are simply not in the frame any more. This is the cheapest useful edit on the page: nothing was staged, a mess was removed.
 Before
 After
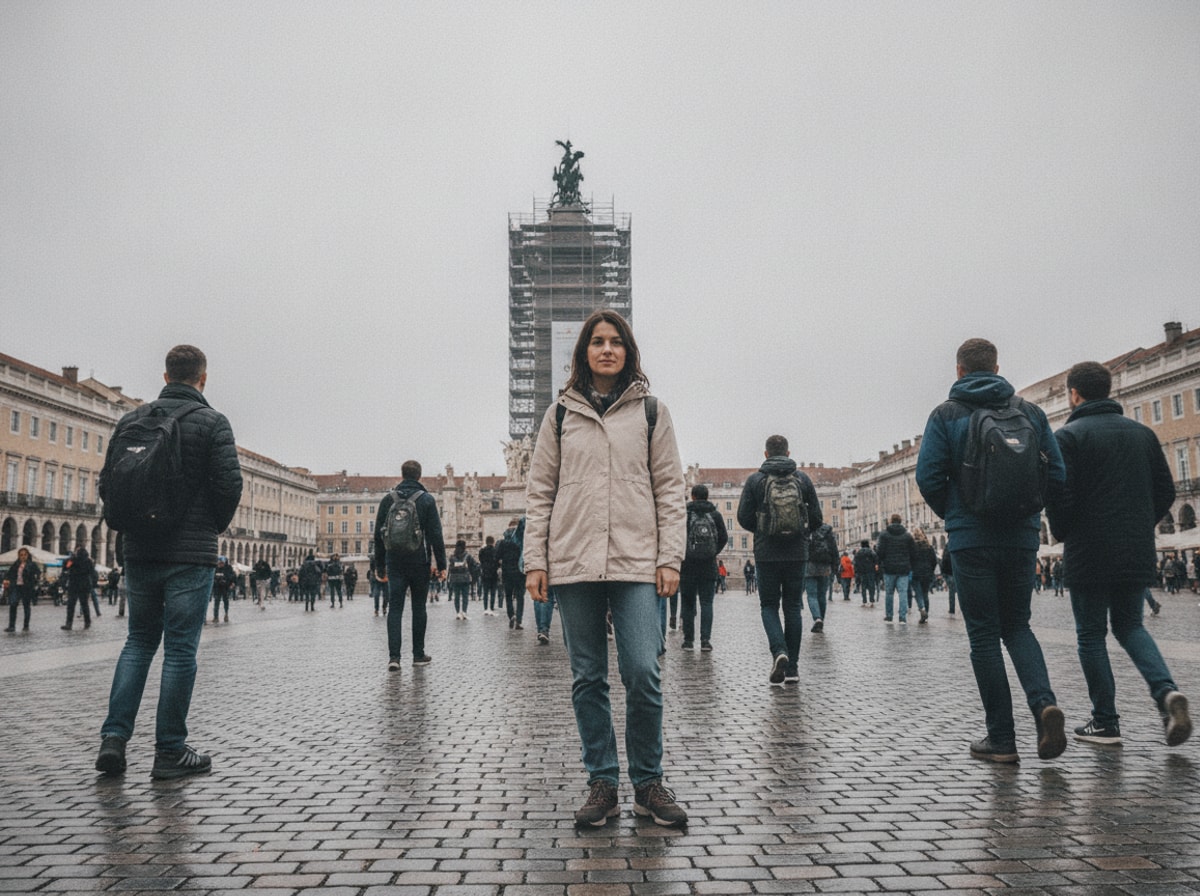
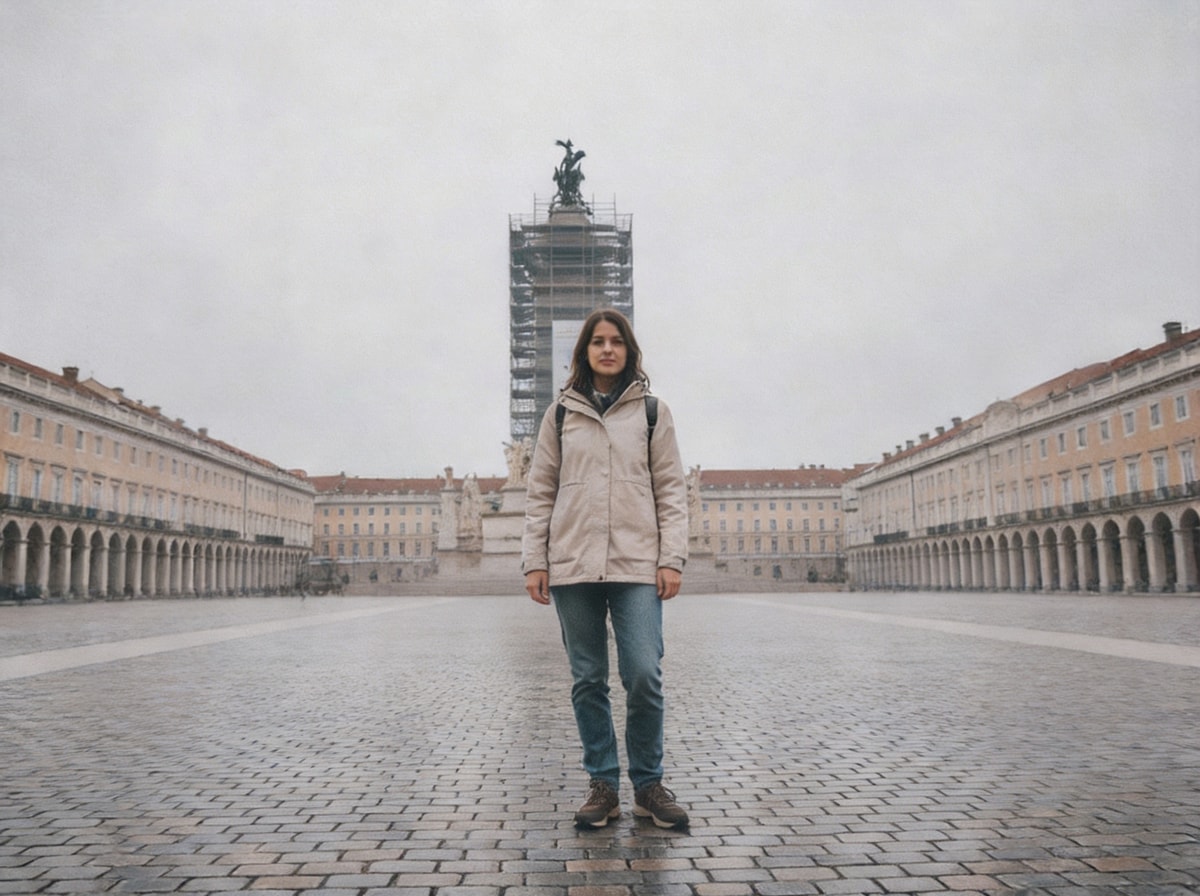
The square without the tourists
The monument, the colonnades, the wet paving and the grey sky are identical. The strangers in front of her and behind her are gone, and the paving carries on through the gaps where they stood, so she is the only person left in the frame.
 Before
 After
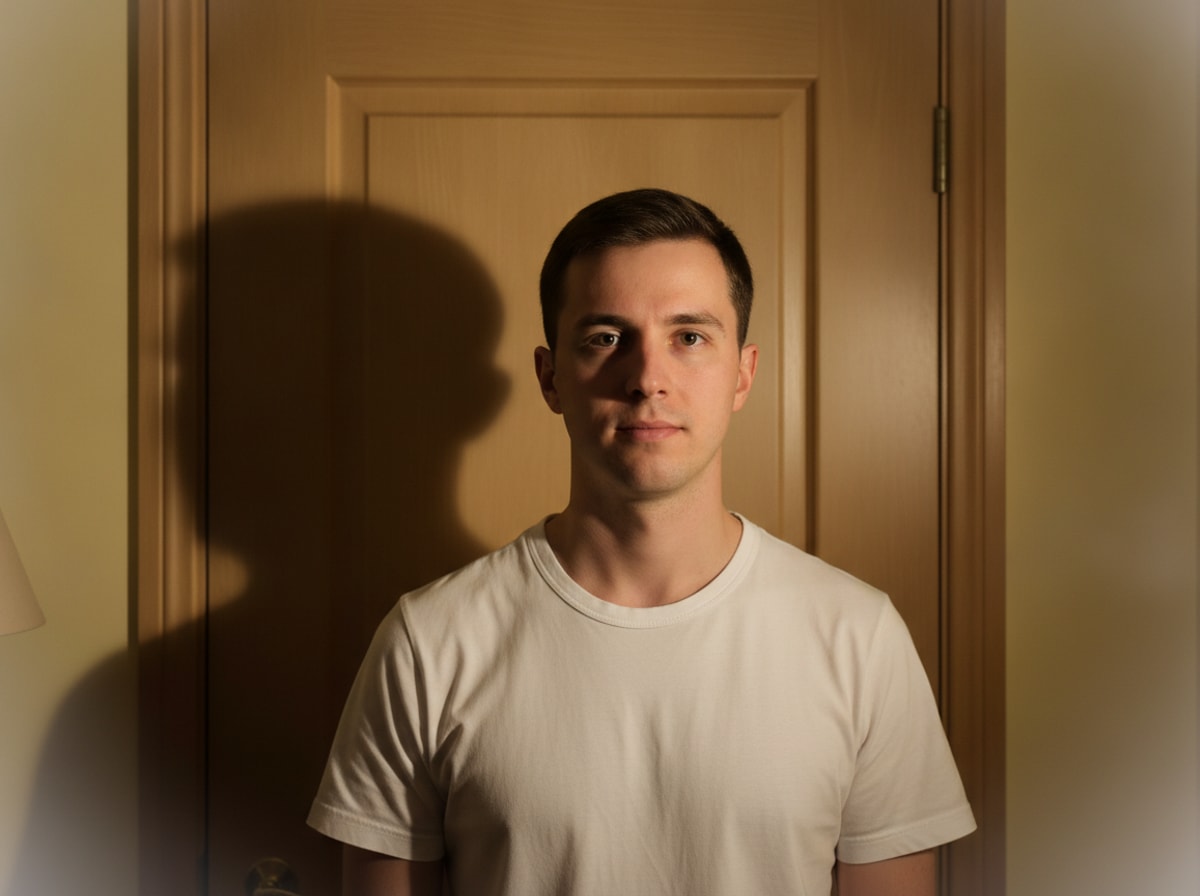
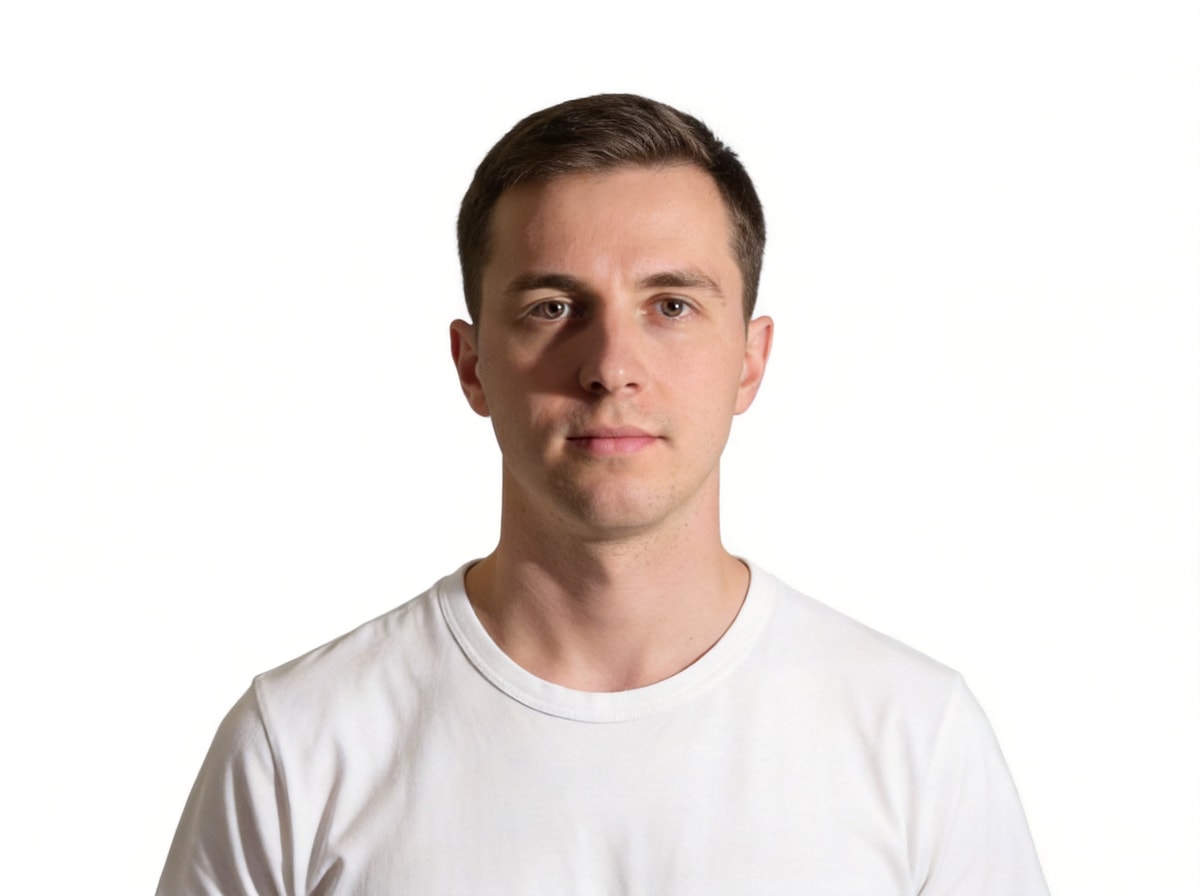
A door behind him, then plain white
Passport, visa and staff-badge forms are unforgiving about what sits behind the head. The door, the yellow wall and the hard shoulder shadow are gone; the same man, the same white tee, the same framing and the same head size stay, lit flat on a white field.
 Before
 After
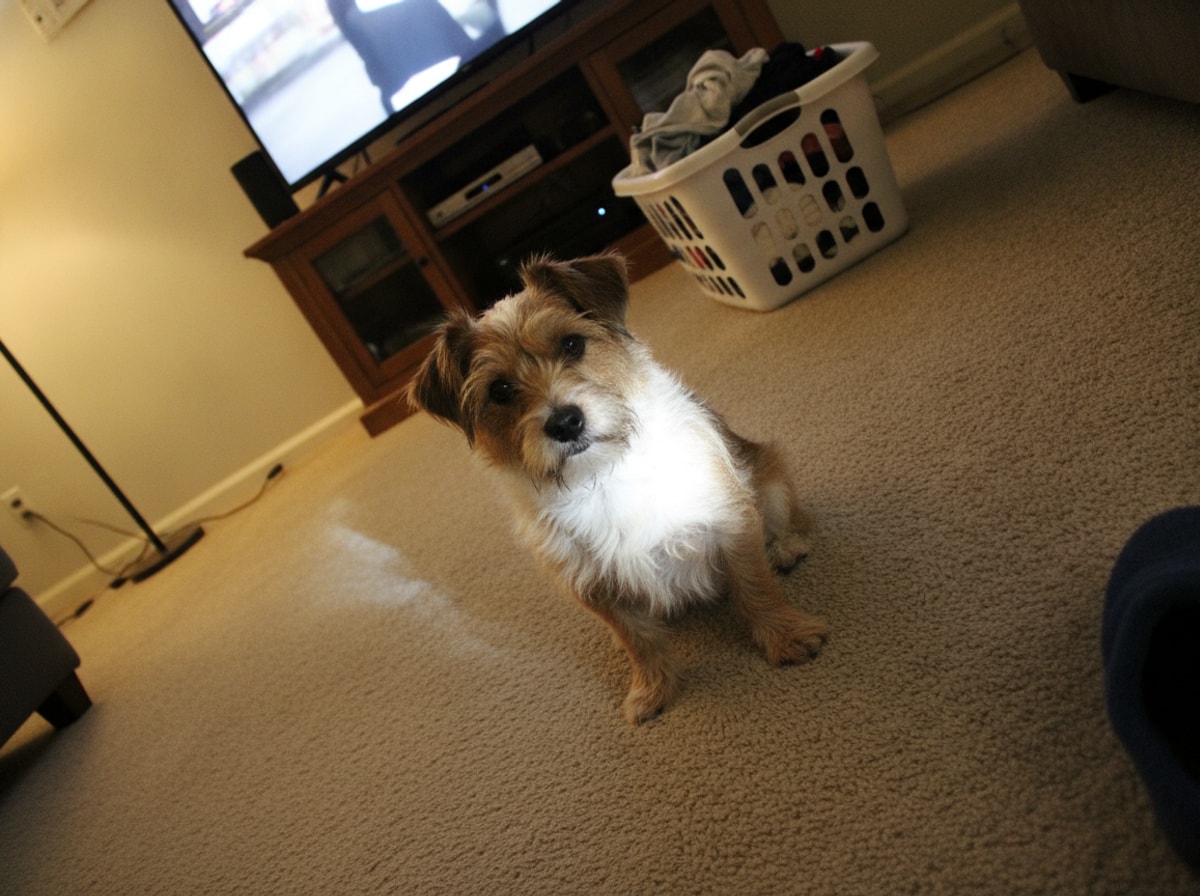
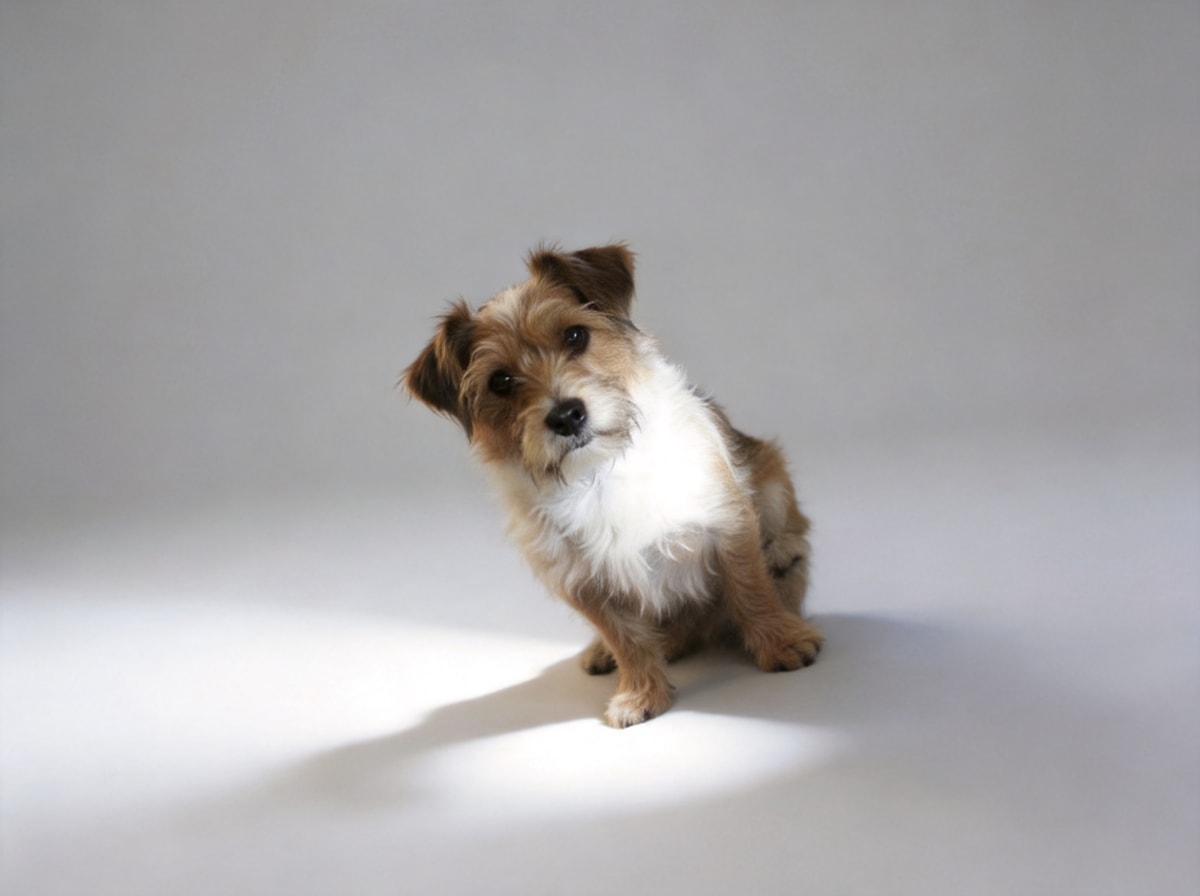
The dog, off the living-room rug
Basket on the left, television stand on the right, the phone flash burning out the white chest. The backdrop changes and nothing else: same terrier, same markings, same sitting pose, same tilt of the head, one clean shadow under the paws instead of a lamp and a wall.
 Before
 After
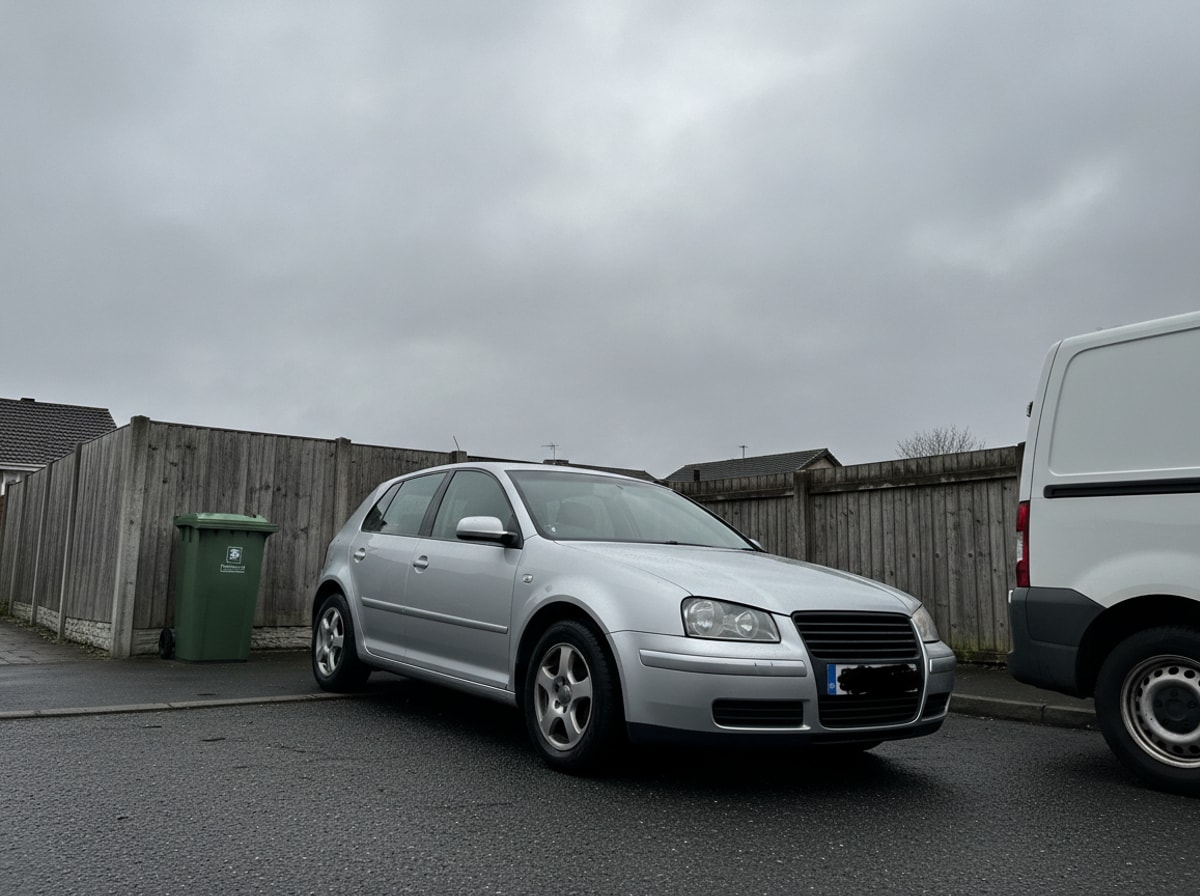
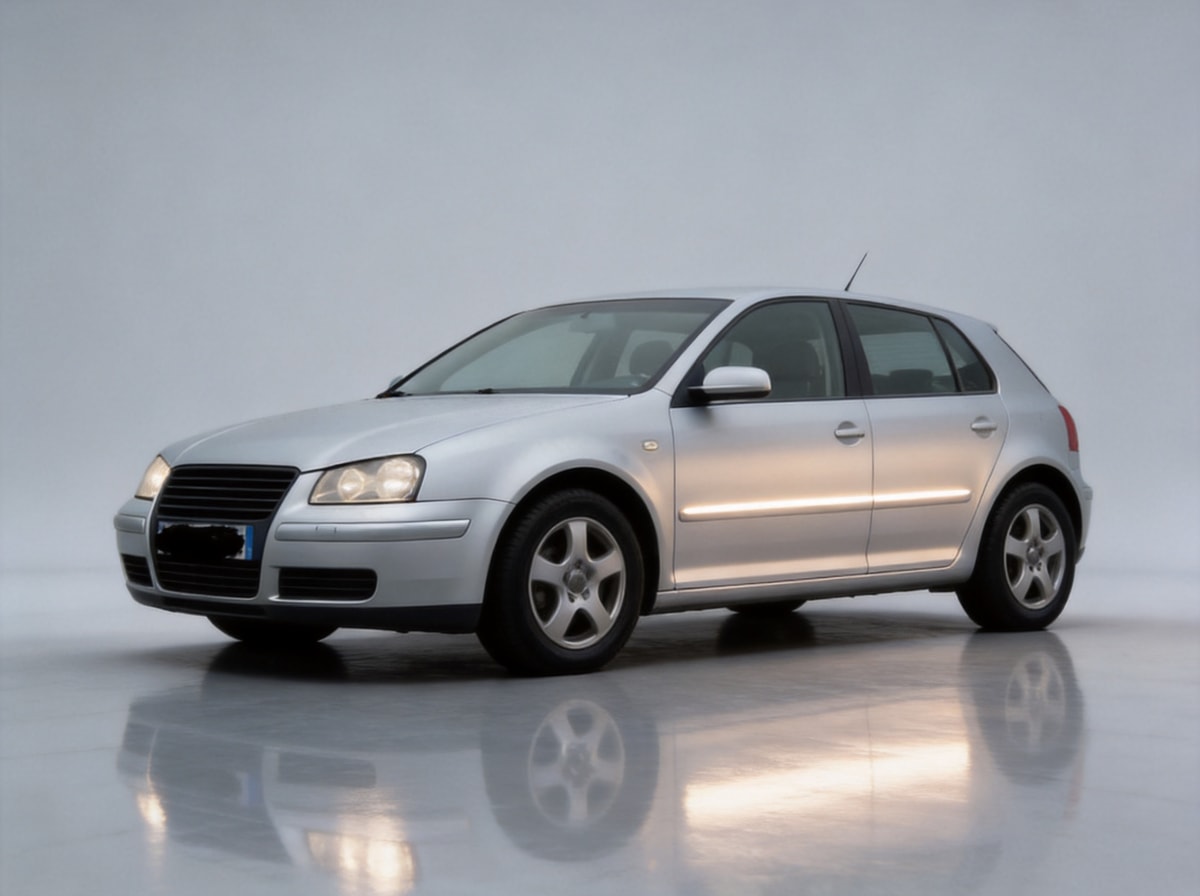
The same car, from the same corner
The viewpoint does not move: grille, both headlights and the front bumper face the camera on the left, the body recedes to the right, exactly as it was shot. The street, the bin and the neighbour’s van are replaced by a studio floor with a reflection under the car.
 Before
 After
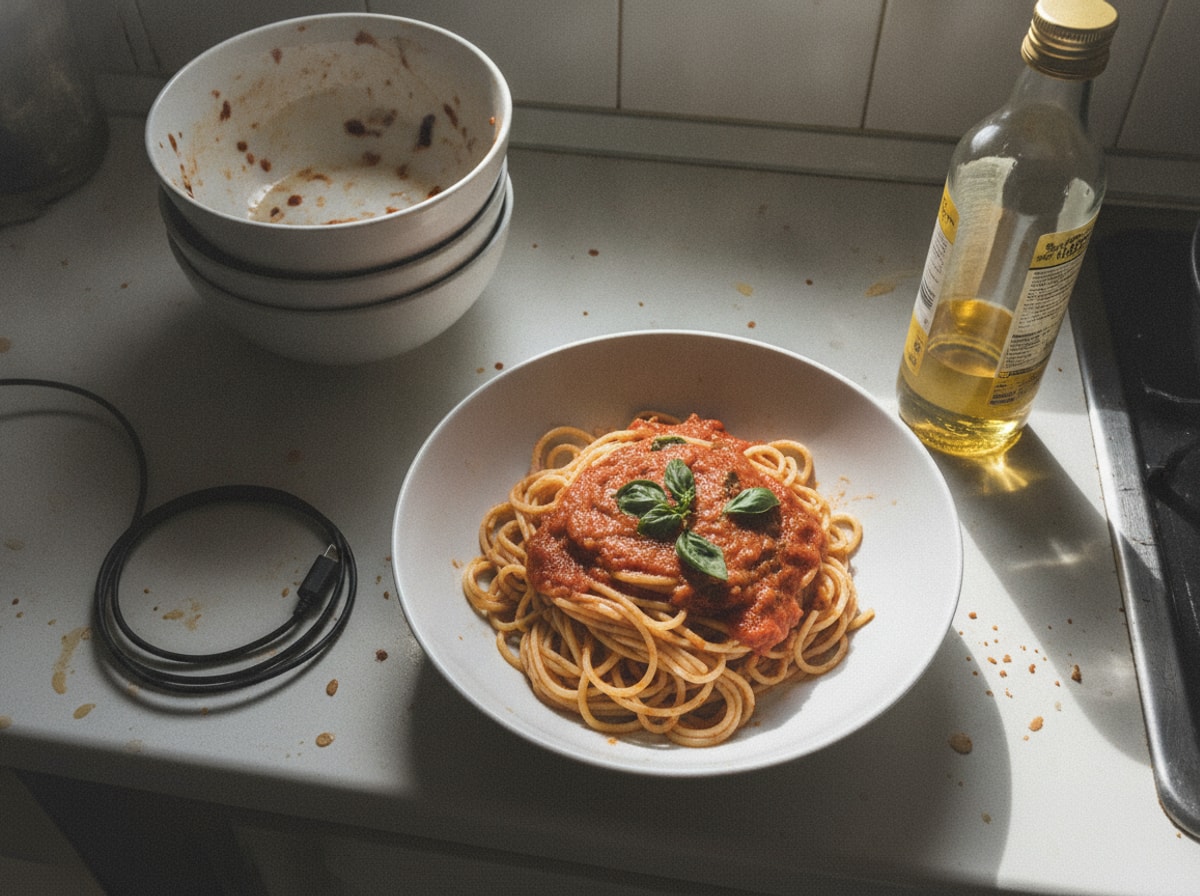
The same plate, under restaurant light
The bowl is the bowl from the counter, the pasta is the same pasta, shot at the same angle. What changed is everything around it: a dark wooden table, a linen napkin, a fork, string lights out of focus and a candle just behind the plate, doing the work a dining room does.
When it fails (hair, crowds, harsh backlight)
Four cases worth knowing before you spend a credit. None of them is a bug; they are the edges of what a single pass can do.
Flyaway hair
Fine strands against a busy background are the hardest edge in photography, for a model as much as for a mask. You get a helmet of hair, or a fringe of grey where the street used to be.
Plain sweeps survive better than busy plates. Inspect at 100% and crop tighter if you must.A second person in frame
Say “keep the man in the denim jacket” and the model may keep the woman behind him too, or dissolve half of her into the new wall. Crowds are the classic failure.
Name who stays, and expect a rerun when the crowd overlaps the subject.Subject blending into the scene
Dark coat, dark hallway, and the edge between them disappears into the new background. The result looks like a double exposure.
Ask for contrast: a lighter sweep, or a rim of light on the shoulder.A logo or label too small to keep
Any background change redraws the frame, and small type is the first casualty. A brand name at the corner of a packet often comes back slightly wrong.
For label-heavy products, use the product photo workflow and check every character.Portraits vs product shots — pick the path
The prompt does not change much between the two. The model does, because a face and a printed label fail in different ways.
Keep the face, then the hair
Start with a model that was built for likeness. Write “keep the face” in the sentence even when it feels obvious, and give the model something to hold: the same pose, the same crop, no request to turn the head.
Hair is where a portrait gives itself away. Check the outline against the old background at 100% before you send it anywhere.
Keep the shape, then the label
Objects hold their silhouette easily and their printed type badly. Pick a model that is strong on packaging, prompt the surface and the light, and then read the label the way a customer would.
A white sweep with one contact shadow is the safest background there is: nothing behind the product to argue with.
Prompt formula: say what stays, then what replaces the scene
Two halves, in that order. The first half protects the subject; the second half describes the new place and the light in it.
Keep [the details that must survive]. Replace the background with [scene + light].
Leave out the adjectives that describe a feeling. “Clean”, “professional” and “premium” tell the model nothing; “white sweep”, “window from the left” and “soft shadow under the product” tell it everything.
Three steps in the studio
Upload, sentence, compare. The same three buttons as every other job on the site.
Upload the photo you have
JPG, PNG or WEBP up to 20 MB. Phone shots are fine. A file where the subject fills a third of the frame or more gives the model an edge it can actually follow.
Name who stays, describe the place
Keep the person or the product in the first half of the sentence, then the new scene and where the light comes from. Pick the model for the subject, not for the style you like.
Check the edge, then export
Zoom to 100% and look at the outline: hair, shoulders, the rim of a mug. If it holds, export PNG or JPG. If it frays, a plainer background is usually the fix, not a longer prompt.
Background change vs background remover
One gives you a cutout and a job for later. The other gives you a finished frame. Which one you need depends on what happens next.
| Background remover | Scenedo | |
|---|---|---|
| What you get | A transparent PNG of the subject | A finished photo with a new scene behind it |
| Next step | You still have to build the background somewhere else | Export and publish |
| Light | Untouched, so it rarely matches the new background | Rebuilt to match the scene you asked for |
| Edges | Hard mask, clean on solid objects, rough on hair | Generated edge, better on plain sweeps, rougher on crowds |
| Best for | A catalogue that needs a cutout file | A portrait or product that needs a finished photo |
Questions about keeping edges and likeness
Will the person still look like themselves?
Usually, if you keep the face in the prompt and use a model built for portraits. Check the hairline and the eyes at 100% before you send it. No model can promise an exact likeness when the whole frame around the face is being rebuilt.
Does the lighting match the new scene?
It matches what you asked for, which is why the prompt names a direction. Mismatches still happen: a soft window in the sentence and hard noon on the subject. Rerun with the light spelled out, or fix the light later in an editor.
What about hair and transparent edges?
The hardest case, for us and for every cutout tool. Plain sweeps are kinder than busy plates, because there is nothing behind the hair to disagree with it. Inspect the outline at 100% and crop tighter if the fringe frays.
Can I put a product on a white background?
Yes — ask for a seamless white or near-white sweep with a soft contact shadow. If the product has a lot of small type on the packaging, the product photo page covers the label checks in more detail.
Background change or background remover?
A remover gives you a cutout: the subject on transparency, with a job still to do. This gives you the finished scene in one pass, light included. If you only need the cutout file, use the remover.
What if there are several people in the frame?
Name the one who stays, and expect trouble when another person overlaps them. Crowds are the most common failure on this page. A tighter crop before upload solves more of these than a longer prompt.
Is it free to try?
Two free tries, no account and no card. Free runs come back at 1K with a small watermark; a plan removes it and opens 2K and 4K.
Where to go next
Two free tries, then pick a plan.
Bring the photo with the bad background. No account and no card for the first two images.